Disk & Folder Level Trend Analysis
FolderSizes offers powerful disk space usage trend analysis capabilities. This article will discuss the types of trend analysis tools that are available, and how best to leverage them.
Disk Level Trends
FolderSizes automatically tracks available and used space for all attached drives. This includes local, removable, network, and other drive types. If a drive is visible in the “Drive Space” docking panel or the “Computer” view, then FolderSizes will store historical space information for that drive automatically, each time the program is launched.
If you prefer to track disk space history for a specific set of volumes, you can do so with the Disk Reporter. Simply start the Disk Reporter and add each volume of interest – again, both local and network volumes are supported. Now every time the Disk Reporter is launched, disk space information will be recorded for each volume that was added.
If you’d like to ensure that disk space history is recorded on a recurring basis, use the built-in FolderSizes scheduling facility. To do so, open the Disk Reporter and click the Schedule button in the toolbar. Here you can establish an execution schedule that suits for you needs. For example, you may elect to run the Disk Reporter for a specific set of paths every day at 6pm. You can also use the scheduler to export Disk Reporter information, or even send it via email – but this isn’t necessary for establishing historical disk space data (the Disk Reporter simply needs run for that to happen).
Learn more about disk trend analysis features here.
Folder Level Trends
Although certainly valuable, disk level trend analysis is sometimes not enough. Often, system and storage administrators need to know more about where disk space growth or contraction has occurred.
Toward that end, FolderSizes has a powerful Trend Analyzer tool that can consume two different types of data – Snapshots (.fssx files) and XML folder data (.xml files). These two file formats each have their unique advantages.
- Snapshots – These are created using the Snapshot creation tool, which can either be launched manually or via the scheduler. Snapshots contain full metadata for every file and folder in the target file system(s). This means that Snapshots can be used to create trend analyses as well as any other report type (including searches, folder reports, and file reports). The disadvantage of Snapshots is that they are larger than XML folder data files and take longer to generate (and consume).
- XML Folder Data – These are created by exporting folder report data (created by selecting or entering a disk or folder path in the main window) as XML, which can be done manually (Save Results ribbon bar button) or via the scheduler. XML folder data files contain only folder level information, and can be re-loaded directly into the FolderSizes main window via the Load Results ribbon bar button. They can also be consumed by the Trend Analyzer, and have the advantage of being smaller (and faster to generate and consume) than full Snapshots – however, they cannot be used to create other reports (such as searches or file reports).
So to summarize, Snapshots capture file and folder information and are therefore more flexible but slower to generate and consume. XML folder data files can be generated and consumed more quickly, but are limited to folder-level data. Snapshots are also considerably larger than XML folder data files – through both compress very nicely, and FolderSizes applies NTFS compression to both file types by default.
Example Scenario
Let’s briefly consider an example scenario where these capabilities might be useful.
Let’s say one of your primary storage systems is experiencing consistent but gradual growth, but due to the complexity of the file system structure you’re having a difficult time determining which areas are accounting for that growth.
To gain visibility into these changes, start by using the FolderSizes scheduler to create daily Snapshots of the target file system. Configure the scheduled Snapshot task to create these Snapshot files in a shared folder, either locally or somewhere on the network.
After some period of time, you’ll have a collection of Snapshot files that represent a history of changes in the target file system. Start the Snapshot Analyzer tool and click the New Analysis toolbar button. Browse to the folder that contains the collection of Snapshot files and click OK to begin the analysis.
Once the initial Snapshot analysis completes, you’ll be presented with a wealth of information about which parts of the target file system have grown or contracted. A good starting point is to select the file system root in the Folders panel (it’ll be selected by default) and then view the contents of the Subfolder Change panel. Sort the Subfolder Change detail report by the “Abs. Change” column in descending order (it’ll be sorted that way by default), and you’ll quickly see which folders have grown the most. You can then double-click on child folders within the Subfolder Change report to drill down as far as required.
Of course, this is just the tip of the proverbial iceberg – the FolderSizes Trend Analyzer can do much more than what I’ve described above. For example, with a bit of sorting you can quickly figure out which folders have shrunk (contracted) the most. Or right-click a Subfolder Change entry to create a “flat” view of the files and/or child folders it contains. You can also filter by date range, export report results, alter the time scale, and much more (see the help file for details).
Conclusion
FolderSizes gives system and storage administrator the ability to understand file system growth and contraction at both the disk and folder level, making it a powerful tool for managing storage system change.
FolderSizes offers powerful disk space usage trend analysis capabilities. This article will discuss the types of trend analysis tools that are available, and how best to leverage them.
Finding Folders by File or Subfolder Count in FolderSizes
FolderSizes includes a powerful search capability that lets you locate folders based on how many files or subfolders they contain. This feature provides valuable insights into your file system organization and helps identify potential areas of concern.
Key Questions You Can Answer
With this search capability, you can easily discover:
- Folders containing an unusually large number of files or subfolders
- Empty folders with no files or subfolders at all
- Folders with a specific range of items (e.g., between 100-200 files)
- And many other file count scenarios
How to Search by File or Subfolder Count
Step 1: Launch the Search Tool
Open FolderSizes and click the Search button to access the search interface.
Step 2: Set Search Locations
Enter the paths you want to search in the Search Paths tab.
Step 3: Create a New Folder Rule
- Switch to the Search Rules tab
- Click the New Rule button
- Select New Folder Rule from the dropdown menu
- In the Folder Rule Editor, select the Item Count tab
Step 4: Configure Count Parameters
The Item Count tab offers two comparison modes:
- Compare immediate file/folder count – Only counts direct children of each folder
- Compare aggregate count – Includes all files and subfolders at all levels below each folder
Set your desired count range using the comparison operators provided.
Step 5: Run the Search
Click OK to save the rule, then click Start to execute the search.
Working with Search Results
After completing the search, you can perform various actions on the results using the toolbar buttons:
- Copy files/folders to a new location
- Move files/folders
- Delete unwanted items
- Archive selected content
Using Pre-Built Sample Searches
FolderSizes includes several pre-configured search samples to get you started quickly. To access these:
- Click the Samples button in the Search window toolbar
- Browse the list of available samples, including one specifically designed to find folders with large numbers of immediate files
- Select the desired sample to load its pre-configured settings
This built-in search functionality makes it simple to identify folders with unusual file or subfolder counts, helping you maintain an organized and efficient file system.
FolderSizes is Safe, Trusted, and Guaranteed
Now that FolderSizes 8 is available to the public, we’d just like to remind everyone about our deep commitment to producing safe software products that you can trust.
FolderSizes 8 is 100% free of viruses, malware, and adware. Please see FolderSizes’ current status on VirusTotal for details.
We also proudly present a Norton Secured seal on our product homepage, and you can view that seal here:
This seal offers independent verification (by Symantec) of website ownership and states that we’re 100% free of malware. It also links to our Norton Rating, which indicates that our website has zero computer or identity threats of any kind.
So please use FolderSizes with confidence, knowing that we’re working hard to produce a safe, trusted, and guaranteed software product.
FolderSizes 8 is Here!
Today I’m happy to announce the public availability of FolderSizes 8 – the new major version of our market-leading disk space analysis and reporting tool for Windows.

It took over a year of active development and hundreds of testing hours to reach this point, and we couldn’t be happier with the result. Nearly every aspect of FolderSizes has been touched by this release, starting with deep improvements to our core file system analysis engine and carrying all the way through to the user interface.
Learn more about what’s new in FolderSizes 8 here, or just go right for the download and try it for yourself.
With the release of FolderSizes 8, we’ve also revealed our new product website. Clean, professional, and mobile device friendly, the new website is designed to help our existing users find what they need quickly while simultaneously showing new users what makes FolderSizes so special.
As always, your feedback regarding FolderSizes 8 is very much appreciated, so don’t hesitate to contact us with your thoughts, questions, or comments.
Free NTFS Permissions Reporter
System administrators are constantly being asked to verify user permissions for specific files and folders. This is often a time-consuming task, with multiple layers of NTFS permissions and repeated adjustments over time creating a security labyrinth.
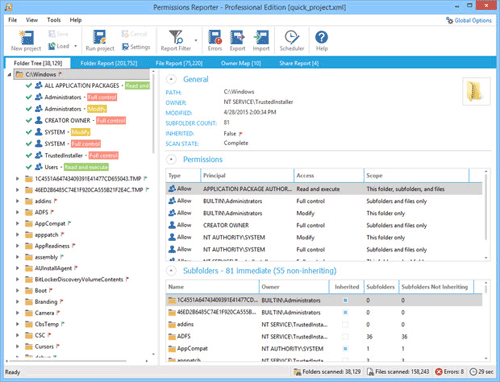
To help address this problem, Key Metric Software has released the first version of Permissions Reporter, a free software tool that allows you to quickly validate the current security posture of entire file systems at once. All with multiple export formats, command-line support, built-in scheduling, and much more.

Download Permissions Reporter today for free and let us know what you think.


